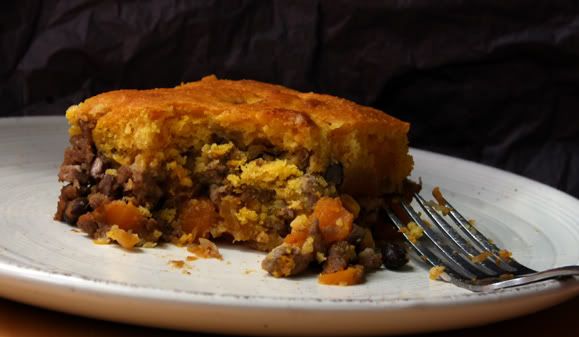
Watch out! This casserole is dangerous . . . . Dangerously irresistible, that is! I've made it twice in the span of a week, and I'm about to make it a 3rd time.
The first time, Joe and I ate it. And we did a good job of it. It was mostly gone the first night. Definitely gone the next day.
I made it yesterday to give to a friend, but as I was finishing the meat part of it, Joe called and said he needed a dish for his office Christmas party the next day. So since it was already made, he got that batch and I'm about to make it a third time for my friend whose husband is in the hospital. I figure she doesn't want to cook right now, and she will enjoy and appreciate some healthy and delicious home cooking. And her husband will probably be able to eat it since it is fairly healthy (he had heart surgery). While the original recipe called for beef, I made it once with ground turkey and once with ground chicken and both were wonderful.
I'm looking forward to the little bit extra that won't fit in the pan that I will put in a little loaf pan for myself (he he he).
Winter Squash-Black Bean Bake with Meat Inspired by Better Homes and Gardens
1 lb. ground turkey or chicken 3 cups of 1/2-inch pieces peeled butternut squash 1 medium sweet onion, chopped 1 15-oz. can black beans, rinsed and drained 1 cup whole kernel corn (I used canned) 1 4-oz. can diced green chiles 1/2 tsp. salt 1/4 tsp. freshly ground black pepper 1 tsp chili powder 1-1/2 tsp chipotle powder a dash cayanne 1 cup lower-sodium beef broth 1 3-oz. pkg. cream cheese, softened 1 8-1/2-oz. pkg. corn muffin mix (the Jiffy mix is 8 1/2 ounces) 1 egg, lightly beaten 1/3 cup milk (I use 2%) 1/3 cup canned pumpkin
Preheat the oven to 400 degrees.
In your biggest skillet, sautee the squash and onion with the salt and pepper until the onion is tender and golden and the squash is close to a point where it could be eaten - sort of like it's aldente.
In a separate pan, cook the meat. I find it helpful to cook it in a little bit of water. It breaks apart easier. Drain off the liquid and fat.
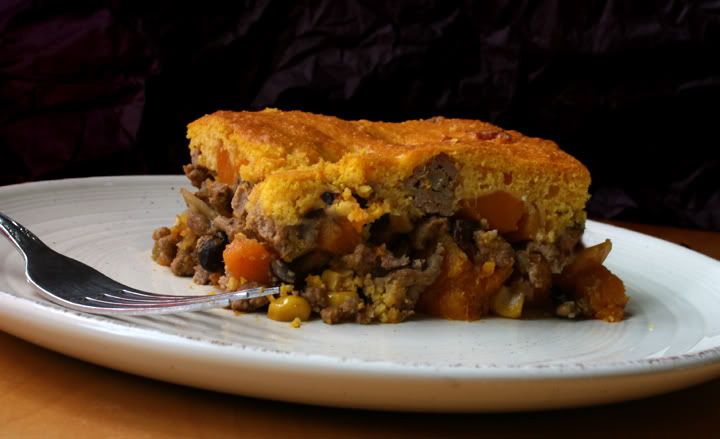
Add the meat to the veggies. With it, add the broth, beans, corn, green chiles, and the spices. Heat it all through and then Transfer mixture to 2-1/2-quart baking dish.
In medium bowl stir together the corn muffin mix, cream cheese, egg, milk, and pumpkin puree until just combined. Spoon over beef mixture.
Bake the casserole for 20 minutes or until toothpick inserted into topper comes out clean.
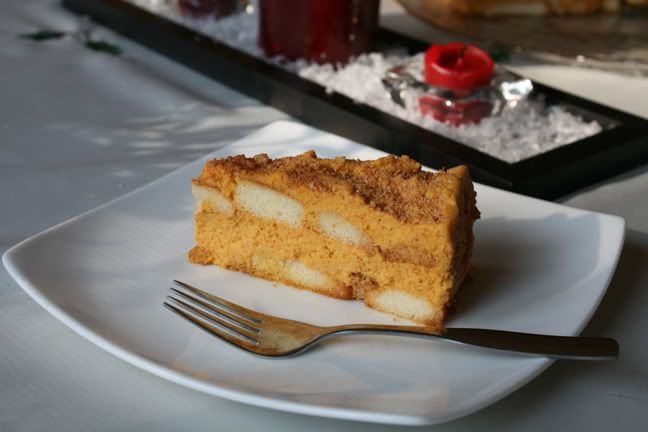
This pumpkin tiramisu was an absolute success, and yet it was so easy to make! My friends were visually impressed and quite happy when it made its way to their plates and then into their mouths. Even several days later, when I brought the last piece, which I saved and guarded with my life, to my friend in CT the night of her holiday party, it was still working it's magic. Linda scoffed it down instead of going for any of the desserts on her table, and raved over it.
In short, you should make this!
It was so easy to make, I made it one-handed. As my life is always full of drama, I broke my wrist in two places the weekend before Thanksgiving. So between my one good hand and my KitchenAid mixer, I was still able to make this. Typing up the blog post was another story - it got delayed until now.
As for the ingredients, let me just write about a couple of them. First, the ladyfingers. I guess the ladyfingers that are traditionally used in tiramisu are somewhat crunchy. So, if you are like me, you won't find crunchy ladyfingers at your grocery store. I only had the soft ones available to me - the kind you put in a trifle. To remedy this, you will have to toast them in the oven. I put them in the oven at 350 degrees for 7 minutes.
The other ingredient I want to mention is the amaretti cookies. I've seen them at Ocean State Job Lot. I got them at a specialty market because I was there and so were they. But if you can't find them, I saw reviewers of the original recipe write that they used ginger snaps. Amaretti cookies are great. And I totally loved eating the leftovers. But hey, if you can't get them, you can't. I would imagine that ginger snaps would be an awesome replacement.
Ooh, there's one more thing I want to mention. Don't skimp on the rum! By the time you eat it, it won't taste too boozy. In fact, I felt it added an essential flavor. When I used it, I used a small nip bottle and covered most of the opening with my thumb as I splashed drips onto the ladyfingers as evenly as possible. The rum was really a wonderful flavor when we dug into this tiramisu.
Do make this the day before you plan to serve it. And then use some self-control. It will be totally worth it!
Pumpkin Tiramisu Bon Appétit
1 2/3 cups chilled whipping cream 3/4 cup powdered sugar 1 (8-ounce) container mascarpone cheese 1 (15-ounce) can pure pumpkin 1 1/2 teaspoon pumpkin pie spice * 2 (3-ounce) packages halved ladyfingers - crisped 1/4 cup dark rum (or regular if that's what you've got) 2 ounces crushed amaretti cookies (if you can't get them use ginger snaps) Powdered Sugar * No pumpkin pie spice? No problem! Just mix 2 tablespoons each of cinnamon and ground ginger with 1 tablespoon ground nutmeg and 1 tsp ground allspice.
Beat the whipping cream and sugar until peaks form. I beat it till stiff peaks formed, but I recommend that you don't. Aim for softer peaks. Then add the mascarpone cheese, pumpkin, and pumpkin pie spice. Mix it until it's smooth and all the ingredients are well-blended.
Line the bottom of a 9-inch-diameter spring form pan with parchment paper. It might be good to make the parchment paper a little too wide. That way, when you put the finished tiramisu on a serving plate, you can slide it off the bottom of the pan, while someone tilts the metal disk toward you. Also, put parchment paper around the sides of the pan.
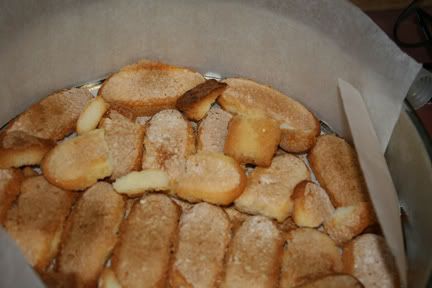
Crisp your ladyfingers in the oven if they are soft. I put my oven at 350 degrees and put the ladyfingers in for 7 minutes.
Spread out an even layer of ladyfingers to cover the bottom.even with 2 3/4-inch-high sides with 1 package ladyfingers, overlapping and crowding to fit. I regret that mine looked so messy. Were I to do it again, I would make this bottom row much neater, more like the 2nd row of ladyfingers looks (you will see that photo soon).
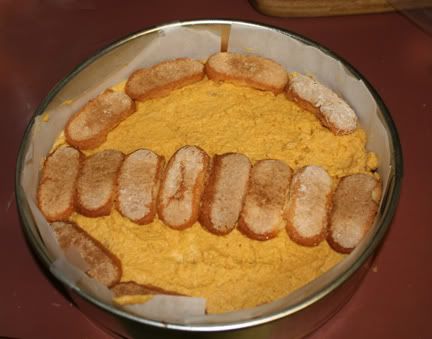
Sprinkle the ladyfingers with approximately 2 tablespoons of rum. Then, spread almost half of the leftover filling over ladyfingers. What I'm getting at is that if it's possible, it would be great if you can save some of the filling to spread it on the sides once you put the entire tiramisu on a plate.
Repeat with second package ladyfingers. Doesn't it look so much neater?
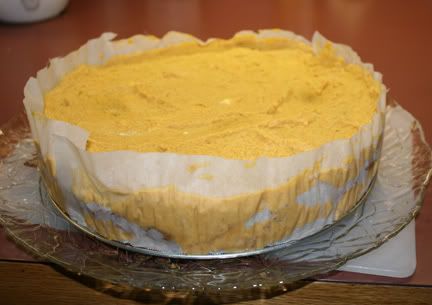
Sprinkle the new layer of ladyfingers with the remaining 2 rum. Top with much of the remaining filling (trying to save some for the sides) and smooth it on the top. A little trick you can use if the smoothing isn't going so well is to spray the bottom of you plastic spatula or spoon with cooking oil spray. That will keep the filling from sticking to it, allowing your top to be smoother.
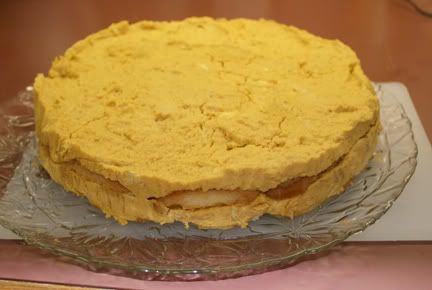
Note: I didn't save any filling for the sides. You may notice that in my photos. That's why I recommend that you do. It doesn't need to be a lot. Most of the sides will have filling already. I'm recommending that you reserve maybe 1/2 cup.
The next day, put the spring form on a serving plate and release the sides of the pan and remove. In this photo below, you can see how I over-whipped my whipped cream. The top layer of mine was very thick. That's why I'm recommending soft peaks.
My husband helped me here to tilt the serving plate, while I lifted the tiramisu with a spatula and carefully grasped the parchment paper underneath it and took the entire tiramisu off of the bottom of the spring form and the parchment. Now my tiramisu was directly on the glass plate. It would have been even easier if the bottom layer of parchment was a little bigger than the pan - even if only in one area.
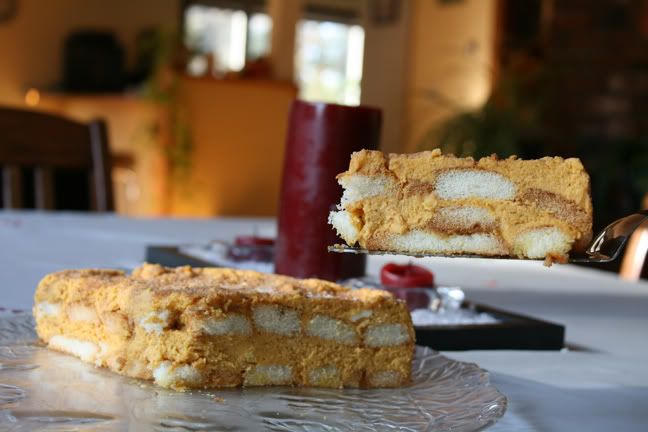
In this next picture, you can see where I wish I had that leftover 1/2 cup filling:
Grind up the amaretti in a food processor or crush it in a bag. Decorate the top with it. Perhaps even the sides. I put some on the sides to cover up flaws.
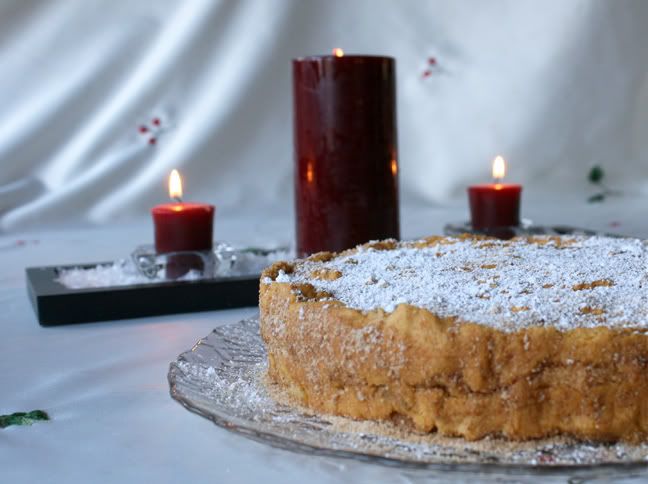
I sprinkled with powdered sugar just before serving.